A small Christmas scenelit / Une petite scène de noël
Bonjour! Helloooo!
Pas très présente en ce moment sur mon blog, mais Noël approche à grands pas, et je ne sais plus où donner de la tête !!! Je ne suis pas prête de décorer mon sapin Lol!... Je me suis lancée dans des projets assez longs à réaliser... bon en même temps c'est un plaisir, donc je ne vais pas me plaindre. :)))
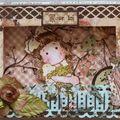
Aujourd'hui je vous montre déjà une petite scène de noël dans la neige, réalisée pour ma DT Tando Créative. Elle passe sur le blog aujourd'hui sur le thème "Hiver glacé...". Les autres filles aussi ont fait de jolies choses toute la semaine, n'hésitez pas à jeter un oeil! Il y a aussi un nouveau challenge en cours ici ce mois-ci, il faut juste faire une réa qui brille et poster le lien sur votre blog.
Ma réa d'aujourd'hui est faite avec un petit kit Tando bien sûr. Celui là, je l'avais avant d'être DT, j'avais craqué dessus sur le Craft Barn l'an passé !!! J'espère que vous aimerez, je trouve ça super mignon même si je ne suis pas complètement satisfaite des couleurs que j'ai choisies... peut-être un peu trop réalistes, et mes sapins sont d'un vert un peu sombre peut-être... Mais bon, je pinaille peut-être... J'attends vos avis avec intérêt, n'hésitez pas à critiquer!
Côté technique j'ai peint tous les panneaux avec des peintures DecoArt et Fresco Finish de PaperArtsy; J'ai aussi utilisé des poudres à embosser argentées, dorées et pailletées, et bien sur.... des paillettes pour que ça brille!! :-) Je n'ai pas résisté à ajouter un petit chandelier qui vient aussi de chez Tando en bas de ma réa, et que j'ai peint aussi avec mes petits pots Fresco Finish en marron et jaune-orangé pour la flamme. J'ai ajouté de la fausse neige à mon décor (j'ai investi dans le stylo Rayher Snow Window, il est super pour l'application!), j'ai détouré quelques petits tampons (qui viennent de 2 planches de chez Crafty Individuals principalement), mis du glossy accents sur mes petites boules... Pas mal de boulot sur cette réa, mais ça vaut le coup je trouve!
I don't post very often in this moment, but Christmas is fast approaching now and I don't know where to start sometimes, so many things to do and so little time!!! I'm not ready to decorate my Christmas tree...:)) But I have a small Christmas winter scene anyway to show you, that's already a start. On Tando's blog we have an icy winter week and I have chosen to decorate the super cute Tando's mini Christmas Scenelit. I had this fab product before I entered Tando's design team, I went absolutely crazy for it last year and bought it on the Craft Barn. Unfortunately I couldn't decorate it as soon as received... So that's done now, I'm happy :)
I used some DecoArt and Fresco Finish paints, embossing powders (I used iridescent sparkle, gold and wow clear silver), fake snow, and a lot of glitter... :-) and stamping of course, as I love my stamps combined to Tando's chipboards. And I couldn't resist adding a mini candle at the bottom, also by Tando.
This Tando's 3D scenelit is really a fab product, I had a lot of fun and even a true joy to build and paint it! It comes in four panels you have to glue together, and having done this you get a wonderful plain dimensional scene... really easy to bring it to live, and so lovely !!
For this time I chose rather realistic colours and stamping (I used mainly some tiny and very cute stamps from Crafty Individuals), but I think the next time I will change my mind and try something totally different !!! Anyway even if I'm not totally satisfied with the result (my fir trees are maybe a bit too dark?...), it's not too bad... hope you like!

Après avoir peint, j'ai tamponné directement en place à certains endroits des éléments qui allaient bien, comme les sapins (Crafty Ind.), les veinures et noeuds de l'arbre (ils viennent d'une belle planche de tampons de fond de chez Chocolate Baroque, j'ai craqué!!), la petite fenêtre et la porte que l'on devine à l'extrème droite...
J'ai aussi glissé une feuille d'acetate entre le dernier panneau et l'avant-dernier, que j'ai tamponné également à l'encre Brilliance Or et embossé à chaud en doré également (le père noël et son traineau, et les petites étoiles...). Je l'ai collé avec de la Glossy Accents.
After painting, I stamped directly on chipboard panels some fitting elements like the fir trees (from Crafty Ind.), the knots of the left-side tree (from a Nature Fragments plate by Chocolote Baroque), the small window and door...
I also added a sheet of clear film cut to the same size as the four panels and rounded, to be inserted between the third and the last one. On this sheet, I stamped a Christmas scene in the sky (using my Brilliance Galaxy Gold dew drop) and heat embossed it gold. I used Glossy accents to adhere it on the remaining at it dries clear and transparent, and is a perfect glue for clear film!
Here a few close-ups on cute details:


Je ne détaille pas toutes les étapes, mon post est déjà bien assez long LOL !! mais voici la liste du matériel que j'ai utilisé pour ma part pour réaliser ce décor. Et si vous avez des questions n'hésitez pas !
I don't have a step by step ready for this project, but here is the list of supplies I used to do the scene. Don't hesitate to request if needed!
Matériel/Materials:
Tando Creative Mini Christmas Scenelit, Mini's Candles (click on the images to go in the shop if desired)


Stamps/Tampons: Crafty Individuals CI-282, CI-257, CI-254, CI-359,
Hero Arts Winter Village, Chocolate Baroque Abstract and Nature Fragments
Woodware Clear Film (acetate),
Paints/Peintures: Gesso, Rayher DecoArt Weinrot, Taupe
PaperArtsy Fresco Finish Ice Blue, Chocolate Pudding, Mocha Mousse, Haystack, Vanilla, Zesty Zinc,
Autumn Fire, Snowflake, French Roast, Holly, Toad Hall, London Night, Claret
Inks/Encres: Archival ink Black, Vermillon, Black Stazon, Brilliance Galaxy Gold
Watercolour Pencils/Crayons aquarellables: Derwent Inktense (the birds)
Embossing powders/poudres à embosser: Judikins Iridescent Sparkle, Wow Clear Silver highlight, Aladine Gold
Glitter/Paillettes: Stickles Dry Fine Glitter Waterfall, Ice Stickles Gold Ice, Decoart Glamour Dust Crystal and Gold
Others/Autres: Glossy Accents, Versamark, Perfect Pearls (red and gold), Rayher Window Snow Pen, Glue pad, twin

J'en profite pour participer aux challenges suivants: / I wish to enter this Scenelit to the following challenges:
Crafty Individuals - Something Festive
FSC Challenge #62 - in the Holiday Spirit
SimonSaysStamps Wednesday Challenge - Make your own background
Live & Love Crafts - Stardust
Je vous dis à très vite, bons préparatifs de noël de votre côté et bon week-end à tous et toutes!... Bises
Wishing you a good preparation of Christmas and a super week-end, see you very soon - HUGS
Coco xxx